
How to Choose and Apply a New Wood Surface to Existing Cabinets
Search results can mix natural-wood sheets, printed film and narrow edge banding. Refacing also calls for sound boxes and a compatible material-and-adhesive system.
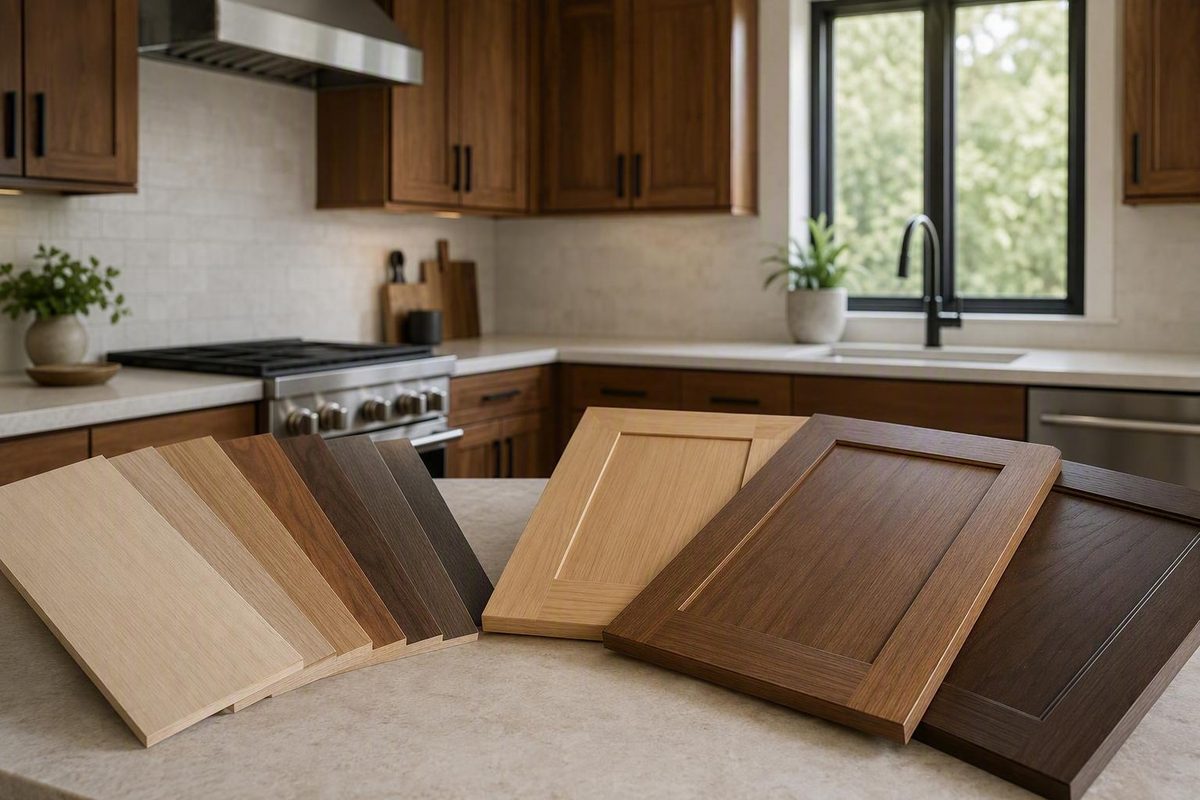
Cabinet veneer can give an existing kitchen a new wood surface without removing cabinet boxes that remain worth keeping. But veneer is not decorative paper that can be pressed onto any cabinet. The finished surface is a system: veneer or laminate, backing, substrate, existing coating, adhesive, edge treatment, finish, and installation method must all be compatible.
Start with condition rather than color or species. Are the boxes dry and structurally sound? Does the layout still work? What coating and substrate are already present? Which adhesive does the veneer manufacturer approve for that assembly? Can the material be cut, pressed, cured, and finished under the product’s specified conditions?
This guide is a planning overview, not a substitute for the selected veneer, adhesive, cleaner, finish, or tool manufacturer’s instructions. If product-specific compatibility, curing, or safety information cannot be obtained, pause the project.
What cabinet veneer is—and what the term does not mean
Real-wood veneer is a thin layer of natural wood bonded to a stable core in a manufactured cabinet component or applied over visible cabinet-box surfaces during refacing. It provides genuine grain without requiring the entire component to be solid lumber.
There are two contexts to distinguish:
- Factory-veneered cabinetry: A panel or cabinet component is manufactured with real-wood veneer bonded to a core such as plywood or MDF.
- Field-applied refacing veneer: An installer applies flexible veneer to the visible surfaces of existing cabinets. The boxes remain in place while face frames, exposed ends, panels, and toe kicks receive new material.
Cabinet refacing frequently pairs resurfaced boxes with replacement doors and drawer fronts. Existing doors can sometimes be retained or rebuilt, but they need a separate plan. Covering the boxes does not automatically update door profiles, hinges, drawer fronts, or hardware.
Retail terminology is inconsistent. A search for “cabinet veneer” can return natural-wood sheets, printed self-adhesive film, and narrow edge-banding rolls even though their composition, appearance, installation, and repair options differ. One marketplace search displayed all three types under the same broad query for cabinet veneer sheets.
| Term | Composition | Typical cabinet use | Natural grain? | Application form | Limited refinishing possible? |
|---|---|---|---|---|---|
| Real-wood veneer | Thin natural wood, often supplied with paper, wood, or another backing | Face frames, cabinet ends, panels, toe kicks, and suitable doors | Yes | Flexible sheets or strips | Sometimes, depending on thickness, finish, substrate, and damage |
| Factory-veneered panel | Real-wood veneer bonded to a stable core | Doors, end panels, furniture panels, and cabinet components | Yes | Rigid finished or unfinished panel | Sometimes, but sanding is limited by the thin wood layer |
| Laminate | Resin-treated layers with a decorative surface | Cabinet exteriors, doors, panels, and shelving | No | Sheet material or prelaminated panel | Generally not by sanding |
| Thermofoil | Vinyl film heat-formed over a shaped core, commonly MDF | Doors, drawer fronts, and some exterior panels | No | Factory-formed component | Usually replaced rather than refinished as wood |
| Decorative film | Printed plastic or vinyl-like film, often self-adhesive | Product-approved cosmetic resurfacing | No | Roll or sheet | Not like real wood |
| Edge banding | Narrow strip of veneer, laminate, or another material | Exposed panel edges and cabinet-opening lips | Sometimes | Narrow roll or strip | Product-dependent |
Edge banding is not a substitute for full-sheet veneer. It covers narrow edges rather than broad cabinet faces or end panels. Conversely, a wide veneer sheet is not necessarily the best material for a thin exposed edge.
Check the product description for actual composition, backing, dimensions, and adhesive format. A species name such as “oak” could describe natural oak veneer, an oak-pattern laminate, printed film, or edge banding.
First decision: are these cabinets suitable for veneer refacing?
Evaluate the boxes before evaluating veneer. Refacing changes visible surfaces; it cannot make weak cabinets structurally sound or turn an impractical footprint into a better layout.
Go/no-go inspection
Cabinets are reasonable candidates for further refacing evaluation when:
- The boxes are dry, rigid, and securely installed.
- Shelves, bottoms, backs, frames, and joints remain serviceable.
- The existing footprint and storage arrangement still meet your needs.
- Visible finishes are worn or dated, but the underlying construction is sound.
- Limited damage can be repaired into a stable, flat bonding surface.
- Doors and drawer fronts can be retained, rebuilt, or replaced as part of a coordinated design.
- Identified moisture or heat problems have been corrected.
Pause for repair or replacement assessment if you find:
- Swollen cabinet bottoms, sides, or composite cores
- Active leaks or recurring condensation
- Warping, rot, or mold
- Broken, loose, or distorted face frames
- Cabinets pulling away from walls
- Extensive delamination
- Crumbling particleboard or another unstable core
- Surface layers that remain loose after reasonable repair
- Construction too weak to justify a new finish
Commercial refacing guidance consistently treats sound boxes and an acceptable layout as threshold conditions. Major water damage, warping, broken frames, poor construction, and desired layout changes are reasons to consider repair or replacement instead of cosmetic refacing.
Veneer cannot correct an unwanted blind corner, inadequate drawer storage, poor appliance clearance, or a box configuration that prevents the desired design. If the main objective is to move appliances, change cabinet dimensions, or redesign the room, replacement or selective reconstruction addresses the underlying problem more directly.
Boxes and doors are separate decisions
Flat cabinet ends and straight face-frame members are generally more manageable than profiled doors. Raised panels, arches, routed profiles, tight inside corners, and complex edges make bonding, grain alignment, trimming, and finishing more demanding. Even when the boxes are suitable for refacing, the doors may not be.
One practical option is to veneer sound boxes and order or build replacement doors and drawer fronts. This avoids forcing flat sheet material over a profile for which it was not designed. If replacement is being considered, review how raised-panel cabinet doors differ from flatter door constructions before choosing the new style.
Also identify the cabinet construction:
The detailed sequence later in this guide applies primarily to face-frame cabinets. Frameless boxes require a separate plan for seams, exposed edges, hinge clearance, and added material thickness.
A simple decision tree
-
Are the boxes dry, stable, and structurally sound? - No: Investigate repair or replacement. - Yes: Continue.
-
Does the existing layout work? - No: Consider replacement, selective rebuilding, or a larger redesign. - Yes: Continue.
-
Can the exposed surfaces be made clean, flat, and stable? - No: Repair the substrate or replace affected panels. - Yes: Continue.
-
Are the doors suitable for the planned treatment? - Yes: Include them in a product-specific plan. - No: Consider replacement doors and drawer fronts while refacing the boxes.
-
Can the veneer, backing, adhesive, substrate, finish, and installation conditions be confirmed as compatible? - No: Stop and obtain written technical guidance. - Yes: Proceed to material planning.
Do not decide suitability from a universal savings percentage, completion time, or lifespan. Those figures vary with cabinet condition, layout, material system, labor, and project scope.
Choosing the material: wood veneer, laminate, or another surface
There is no universally best cabinet surface. The decision depends on whether you prioritize natural variation, visual consistency, routine maintenance, moisture exposure, repair options, impact resistance, or budget.
Real-wood veneer
Wood veneer supplies genuine grain, figure, texture, and natural color variation. Depending on the product, it may accept a compatible stain, paint, sealer, or clear finish.
Repairability requires qualification. A shallow finish scratch may permit touch-up, and some veneer can be sanded lightly. The safe amount depends on the veneer’s thickness, how much wood remains, the finish, the substrate, and the depth of the damage. Aggressive sanding can cut through the decorative wood layer.
Laminate
Laminate generally offers more uniform color and grain, along with a broad range of printed colors, patterns, and textures. Suppliers often position it as a lower-maintenance option for routine wear, although performance still depends on the particular laminate, core, fabrication, seams, and edge treatment.
Substantially damaged laminate normally cannot be sanded and refinished like wood. A deep chip, worn decorative layer, or major delamination may require replacement of the affected surface or panel. Seams and matching edge treatments also need deliberate planning.
Thermofoil and decorative film
Thermofoil is vinyl film formed over a core rather than natural-wood veneer. It can create a uniform surface, particularly on doors, but contractor guidance identifies heat-related delamination as a concern. It should be evaluated as a separate material rather than grouped with wood veneer or laminate.
Decorative self-adhesive film is another distinct product category. A printed wood pattern does not make it natural veneer. Use it only where its manufacturer approves the substrate, application, and expected kitchen exposure.
| Consideration | Real-wood veneer | Laminate | Thermofoil or decorative film |
|---|---|---|---|
| Composition | Thin natural wood, often with backing | Resin-treated layers and a decorative surface | Vinyl or plastic film; thermofoil is formed over a core |
| Appearance | Genuine grain and figure | Uniform colors, solids, wood prints, and patterns | Highly uniform printed or solid surface |
| Natural variation | Expected | Minimal unless designed into the print | Minimal |
| Seams and edges | Grain, joints, and edge strips require planning | Seams can remain visible; matching edge treatment matters | Thermofoil may wrap profiles; field-applied film still requires controlled edges |
| Maintenance | Gentle cleaning; finish-dependent | Usually straightforward; product-dependent | Product-dependent |
| Moisture caveat | Failed edges or prolonged exposure can contribute to lifting or distortion | Water entering failed edges can swell a wood-based core | Moisture can affect edges or the core |
| Repairability | Touch-up or limited refinishing may be possible | Major damage often requires surface or panel replacement | Local repair may be difficult or conspicuous |
| Best-fit priority | Authentic wood appearance and natural variation | Uniformity, printed choice, and lower-maintenance expectations | Uniform appearance where the particular product and exposure are suitable |
Real-wood veneer is not automatically suitable beside every sink or appliance, and laminate is not immune to water intrusion. Veneer can peel or distort after prolonged moisture exposure or edge failure; a laminate-covered composite core can swell if water passes through a failed seam. The complete assembly matters more than the category name. Supplier comparisons likewise describe veneer as real wood with natural variation and laminate as a resin-based surface with more uniform printed choices, while qualifying repair and moisture behavior by the system rather than appearance alone.
A hybrid scheme can be considered—for example, natural veneer on prominent faces and a different approved surface in high-impact locations. The materials must still coordinate in color, sheen, thickness, seams, and edge treatment, and each product must be suitable for its assigned location.
Before buying, review:
- Physical samples in the actual kitchen light
- Technical and installation instructions
- Backing and adhesive specifications
- Finish compatibility
- Core or substrate requirements
- Edge-treatment options
- Warranty terms and exclusions
- Cleaning instructions
- Heat and moisture limitations
Backing, grain, sheet size, and other buying specifications
A listing that says “real wood veneer” is not specific enough. Backing, adhesive format, grain cut, matching, sheet size, and finish state affect handling and appearance.
Paper-backed veneer
Paper-backed veneer is flexible and appears frequently in cabinet-refacing instructions. One retailer describes its paper-backed product as approximately 1/64 inch thick and suitable for flat or curved surfaces. That is a seller-specific product description, not a universal thickness or a promise that it will conform to every cabinet profile without a prescribed application method.
Thin material can simplify cutting and wrapping, but it also makes substrate flatness important. Plywood grain, dents, seams, ridges, screw heads, and abrupt filler transitions may show through.
Two-ply wood-backed veneer
Two-ply veneer combines a decorative face with a second wood layer. Sellers describe it as thicker and sturdier than paper-backed material. That may improve handling in some applications, but it does not make two-ply universally better.
Pressure-sensitive peel-and-stick veneer
Pressure-sensitive adhesive, or PSA, is preapplied to the veneer. It reduces the need to spread a separate adhesive but does not eliminate preparation.
PSA veneer still requires:
- A manufacturer-approved substrate and existing coating
- A clean, dry, stable, and flat surface
- Accurate initial alignment
- Controlled liner removal
- Firm, even pressure
- Planned trimming and edge treatment
- Compliance with specified storage and application conditions
- The required cure or waiting period before finishing and reassembly
Repositioning behavior is product-dependent. Confirm it from the named product’s instructions rather than assuming every PSA sheet can be moved after contact.
Unsupported raw veneer
Unsupported raw veneer is an advanced and separate category. Large raw leaves may require a manufacturer-approved adhesive, cauls, pressing equipment, vacuum equipment, or another controlled method. Do not transfer instructions for paper-backed or PSA veneer to raw material.
A woodworking forum discussion about raw veneer over finished cabinets contains several conflicting proposals and disputed advice. The reports are anecdotal rather than a validated cabinet-refacing specification for broad use. Use raw veneer on finished cabinet boxes only when the veneer and adhesive manufacturers approve the complete bonding and pressing method.
Grain cut and matching
The way a log is sliced changes the pattern:
Matching also affects continuity:
- Book matching opens adjacent leaves like book pages, creating mirrored grain.
These are planning techniques, not guarantees that every sheet will match perfectly. Natural wood varies, and matching upgrades may be available only for selected products.
Catalogs illustrate the range sold under the cabinet-veneer label: natural and reconstituted wood, bamboo, numerous species, several grain cuts and backings, optional PSA, selected matching upgrades, and sheet formats including 4 by 8 feet and 4 by 10 feet, with cross-grain formats on some products in the cited catalog.
Estimating sheet quantity
Measure by component instead of multiplying the kitchen’s linear footage by a rough factor:
- List every exposed cabinet end.
- Measure each face-frame stile and rail.
- Measure toe kicks and exposed cabinet bottoms.
- Measure cabinet-opening edges that need banding.
- Include fillers, applied panels, and moldings being resurfaced.
- Record the grain direction for every piece.
- Map seams before laying out cuts.
- Add the trimming allowance specified by the product and cutting plan.
- Account for natural defects, unusable margins, matching, cutting errors, and future repair material.
Do not assume rectangular offcuts are interchangeable. Grain direction or color variation may make a leftover unsuitable for the next component.
Comparing prices correctly
Normalize each quote for:
- Total and usable sheet area
- Species and cut
- Backing and stated thickness
- Grade
- Sequence or book matching
- PSA or separate adhesive
- Finish state
- Shipping and oversize charges
- Expected waste
As illustrative snapshots accessed August 11, 2026, one seller catalog displayed starting prices from $1.39 to $7.49 per square foot, depending on product and options in its catalog listings. A marketplace result displayed a 24-by-96-inch self-adhesive red-oak sheet for $79.99. That sheet contains 16 nominal square feet, producing a nominal material price of about $5.00 per square foot before shipping, waste, or unusable material in that marketplace snapshot.
Those figures are not directly comparable without accounting for backing, grade, matching, usable yield, adhesive, shipping, and waste. Prices, stock, options, and delivery charges can change, and neither figure represents a complete refacing cost.
Substrate and adhesive compatibility come before installation
Can veneer go over painted wood, stained wood, varnish, plywood, MDF, particleboard, or laminate? Possibly—but not automatically.
Compatibility depends on:
- Veneer type and backing
- Adhesive system
- Actual substrate or core
- Existing finish or coating
- Surface stability and flatness
- Grease, polish, wax, silicone, dust, or other contamination
- Specified application conditions
- Required pressure and curing procedure
- Planned stain, paint, sealer, or clear coat
Identify the cabinet surface rather than guessing from its appearance. A smooth painted face may conceal solid wood, plywood, MDF, particleboard, old laminate, or an earlier refacing layer. Those materials can present different porosity, stability, edge conditions, and failure risks.
There is no evidence-supported universal cabinet-veneer adhesive. Available guidance discusses PSA, contact cement, heat-activated systems, PVA, hide glue, and specialized veneer adhesive in different applications. That variety is a reason to follow a named product system—not to select whichever adhesive is most convenient.
If the veneer and adhesive come from separate suppliers, ask both manufacturers to confirm the exact combination. Retain the relevant manual, technical data sheet, or written support response identifying:
- The named veneer and backing
- The adhesive product
- The substrate and existing coating
- Required cleaning and preparation
- Application conditions
- Working or open time
- Pressure method
- Cure schedule
- Compatible finish
Conflicting, incomplete, or noncommittal answers are a stop condition. A statement that an adhesive “works on wood” is not approval for a particular backed veneer over a particular cabinet coating.
Compatibility worksheet
| Field | Project entry |
|---|---|
| Cabinet location or component | |
| Substrate or core | |
| Existing coating or surface | |
| Surface condition | |
| Cleaner and required rinse procedure | |
| Repairs and filler | |
| Veneer product and species | |
| Backing and stated thickness | |
| Adhesive system | |
| Veneer-manufacturer approval document or response | |
| Adhesive-manufacturer approval document or response | |
| Approved application conditions | |
| Working or open time | |
| Pressure tool and method | |
| Cure time before trimming, finishing, or loading | |
| Compatible finish | |
| Hidden-area check procedure | |
| Observation period and result | |
| Unresolved or conflicting guidance |
A hidden-area bond check is a prudent checkpoint, not a universal test with a homemade pass/fail rule. Use the product manufacturer’s preparation, application, pressure, cure, and observation procedure.
Telegraphing and surface stability
Thin veneer may reproduce the shape or texture underneath it—a defect commonly called telegraphing. Plywood grain, old seams, dents, ridges, screw heads, chipped edges, and abrupt filler transitions can become visible through the new surface.
Grease, dust, loose paint, brittle clear coat, unstable laminate, and poorly bonded previous refacing layers can also undermine adhesion. New adhesive cannot strengthen a weak layer beneath it; the veneer is only as stable as the surface to which it is bonded.
Face-frame cabinet refacing: preparation and installation order
The following sequence is a planning overview for backed or pressure-sensitive veneer on face-frame cabinet boxes. It is not a validated procedure for every product and does not replace the selected veneer, adhesive, cleaner, finish, edge-banding, or tool instructions.
Before beginning, obtain the product labels, technical instructions, and any applicable safety data sheets and tool manuals. This article cannot establish product-specific exposure controls, ventilation, protective equipment, heat-tool practices, or safe handling requirements. If those instructions are unavailable or conflict, do not proceed.
Tools by function
Select tools according to the approved product method:
- Disassembly: Screwdrivers, drill/driver, labels, and hardware containers
- Measuring and layout: Tape, straightedge, square, pencil, and component schedule
- Cleaning: Supplies approved for the existing surface and adhesive
- Repair and preparation: Compatible filler, sanding tools, abrasives, and dust-removal supplies
- Cutting: A sharp veneer-approved cutting tool, stable straightedge, and cutting surface
- Bonding: Tools specified for the separate adhesive, or controls for a PSA release liner
- Pressure: An approved scraper, smooth block, or roller
- Edges: Selected edge banding and its compatible application equipment
- Finishing: Product-compatible abrasives, applicators, and coatings
1. Document and disassemble
Photograph the kitchen before removing anything. Label every door, drawer, hinge, and hardware location so the original arrangement and reveals can be reconstructed.
Remove doors, drawers, hinges, pulls, and trim that obstructs the work. Protect cabinet interiors and adjacent surfaces as required by the products and tools being used.
2. Clean and inspect
Remove kitchen residue using a method approved for the existing surface and proposed adhesive. Follow the cleaner’s instructions, including any required rinse and drying period.
Inspect the cabinets again after cleaning. Residue can conceal finish failure, cracks, swelling, or loose material. Correct leaks, recurring condensation, or heat-related problems before covering the affected area.
3. Repair and flatten
Secure loose frame members and any surface layers that can be reliably repaired. Use only fillers and repair materials accepted by the bonding system. Level repairs and feather transitions so they do not form abrupt ridges.
Examine broad surfaces under raking light. If plywood grain, seams, dents, chipped edges, or filler boundaries are visible or readily felt, thin veneer may reproduce them.
4. Scuff only where the product requires it
Scuff-sanding can reduce gloss and create the surface condition required by a particular adhesive; it does not automatically mean stripping the entire finish.
One documented homeowner project used 120-grit abrasive to scuff face-frame cabinets and described the purpose as reducing gloss rather than removing all of the existing finish before applying PSA veneer. That grit is a project example, not a universal specification. Follow the instructions for the identified coating, substrate, veneer, and adhesive.
5. Remove dust and verify the system
Remove preparation residue by the method approved for the bonding system. Complete the manufacturer-directed bond check and observation period before cutting material for the entire kitchen.
If the sample lifts, bubbles, transfers the old coating, or pulls away an unstable layer, stop.
6. Map grain, seams, and sequence
Dry-plan the pieces before exposing adhesive. Mark:
- Cabinet ends
- Toe kicks
- Inside opening edges
- Vertical stiles
- Horizontal rails
- Grain direction
- Sheet and cut-piece numbers
- Seam locations
- Planned overlap or meeting joints
Lay the pieces out in viewing order. Natural color changes that appear modest on a worktable may become conspicuous across adjacent cabinets.
7. Install broad end panels and inside edges
In one documented supplier sequence, exposed end panels are installed first, followed by inside opening edges, stiles, and rails for face-frame refacing. This order can establish consistent layer termination, but it is not mandatory for every product or cabinet configuration.
Use the selected edge material on narrow opening edges where the system calls for it. Do not assume full-sheet veneer and edge banding share the same adhesive or application method.
8. Cut pieces oversized
Several refacing examples use approximately one-half inch of added material for later trimming, but this is not a fixed allowance. The correct amount depends on the component, grain alignment, cutting method, and product instructions for the documented refacing process.
Confirm the sheet’s face, backing, and grain orientation before cutting. Use the cutting direction and technique specified for the material.
9. Apply the veneer according to its adhesive system
For PSA veneer, align the piece while most of the release liner remains in place. Expose the adhesive gradually and keep the unbonded portion controlled so it does not contact the cabinet prematurely.
For a separate adhesive, follow its specified:
- Surface preparation
- Coating location and amount
- Open or working time
- Positioning method
- Pressure requirement
- Application conditions
- Cure time
Do not transfer instructions among contact, PVA, heat-activated, and pressure-sensitive systems.
10. Press methodically
Use the scraper, block, or roller approved for the selected veneer and adhesive. Work in the specified direction and establish even contact, especially at edges and transitions.
Pressure helps compatible, correctly aligned materials make contact. It cannot remove contamination, flatten a failing substrate, or make an unsuitable adhesive compatible.
11. Apply stiles before rails when that sequence is approved
Documented face-frame examples place vertical stile pieces before horizontal rail pieces. This creates a repeatable layer order at frame intersections.
Choose one consistent grain and joint convention. Alternating overlaps or improvised layer order can make the intersections appear patched rather than intentional.
12. Trim overhang and form controlled joints
Trim with a sharp, approved tool using the recommended cutting direction and support.
One documented face-frame method scores through overlapping horizontal and vertical pieces at an inside corner, then removes the waste from both layers so the pieces meet at a controlled joint rather than leaving a bulky overlap. Practice any source-specific technique on scrap and use it only if the material instructions permit it.
13. Cure before finishing and reassembly
Observe the specified cure period before sanding, finishing, attaching hardware, or loading the surface. One seller’s instructions recommend waiting 24 hours after installation before applying stain or finish, but the actual veneer and adhesive documentation must control the schedule for the selected system.
Finishing, care, and the failure points to inspect
A real-wood face does not mean every wood coating is compatible. The suitable finish depends on the veneer, factory preparation, adhesive, substrate, color system, and desired sheen.
One seller’s example recommends hand sanding with 150 grit followed by 180 grit before finishing. A separate homeowner project used 220 grit for finish sanding. These are product- and project-specific examples, not universal prescriptions for those documented methods.
Confirm whether the veneer arrives presanded and whether further sanding is permitted. Aggressive sanding can cut through the decorative layer and expose backing, adhesive, or core.
Troubleshooting table
| Symptom | Possible contributing conditions | Practical response |
|---|---|---|
| Bubbles or wrinkles | Misalignment, premature contact, trapped air, uneven pressure, contamination, or incompatible adhesive | Follow the product’s repair procedure; do not assume additional rolling will fix contamination or incompatibility |
| Telegraphing | Plywood grain, seams, dents, ridges, screw heads, or poorly blended filler | Correct the substrate before installation; bonded material may need replacement |
| Loose corners | Inadequate contact, weak substrate, damaged adhesive, or unsuitable corner detail | Verify that the substrate and adhesive remain sound before attempting local repair |
| Lifting edges | Contamination, weak bonding, unstable coating, damaged edge treatment, heat, or prolonged moisture | Remove the cause and use only a product-approved repair method |
| Chipped cuts | Dull or unsuitable tool, unsupported edge, incorrect cutting direction, or excessive force | Recut if allowance remains; otherwise follow the approved patch or replacement method |
| Visible seams | Poor matching, inconsistent grain, gaps, bulky overlaps, or uneven trimming | Correct during dry layout when possible; replacement may be less conspicuous than filler |
| Peeling | Incompatible adhesive, unstable original finish, contamination, inadequate bonding, heat, or moisture | Investigate the full assembly rather than applying spot glue automatically |
| Swelling or delamination | Water reaching a wood-based core, unresolved leak, failed seam, or prolonged wetting | Correct the moisture source and assess whether the surface, panel, or cabinet requires replacement |
Telegraphing is different: it reflects texture or shape beneath the veneer. Pressure cannot remove a dent, raised seam, or coarse plywood grain after the sheet has been bonded.
Peeling and edge lift require diagnosis. Check the underlying finish, adhesive transfer, edge condition, nearby appliance heat, sink or dishwasher moisture, and movement in the substrate.
Decide whether damage is superficial or structural
A shallow finish scratch, tiny chip, or localized loose edge may permit touch-up or a product-approved repair. General veneer guidance describes local loose-edge repair methods, but their suitability depends on the actual backing, adhesive, finish, and core rather than a universal procedure.
Replacement is more likely to be appropriate when there is:
- A swollen or crumbling core
- Widespread delamination
- A recurring leak or heat problem
- Structural weakness
- Large areas of failed underlying coating
- Sand-through damage
- A repair that would leave an unacceptable seam or color mismatch
For routine care, use the cleaner approved for the finish, clean gently, and avoid harsh chemicals. Remove moisture promptly rather than leaving water at seams or edges. Limit prolonged direct sunlight where practical because natural wood and finishes can change color unevenly.
There is no defensible universal lifespan for cabinet veneer. Service life depends on cabinet condition, veneer construction, adhesive, preparation, edge treatment, finish, exposure, use, and maintenance.
A final cabinet-veneer buying and project checklist
Cabinet condition
- [ ] Cabinet boxes are dry, stable, and securely installed.
- [ ] Frames, sides, bottoms, backs, and joints are structurally sound.
- [ ] There is no unresolved leak, condensation, swelling, rot, mold, or heat damage.
- [ ] Loose material can be repaired into a reliable bonding surface.
- [ ] Broad surfaces can be made flat enough to limit telegraphing.
Project fit
- [ ] The existing layout still works.
- [ ] Cabinets are identified as face-frame or frameless.
- [ ] Doors and drawer fronts have a separate treatment plan.
- [ ] Complex or damaged doors will be replaced if sheet veneer is unsuitable.
- [ ] The project does not depend on veneer correcting structural or layout problems.
Material identity
- [ ] The product is identified as real-wood veneer, laminate, thermofoil, decorative film, edge banding, or a factory-veneered panel.
- [ ] A wood-look image has not been mistaken for proof of natural wood.
- [ ] Full sheets and edge banding are assigned to appropriate surfaces.
- [ ] Physical samples have been viewed in the kitchen.
Veneer specification
- [ ] Species and natural color range are documented.
- [ ] Grain cut and direction are recorded.
- [ ] Backing type and adhesive format are known.
- [ ] Thickness is recorded where stated.
- [ ] Sheet dimensions and usable area are known.
- [ ] Grade and expected natural defects are understood.
- [ ] Matching options have been considered.
- [ ] Presanded or finish-ready status is confirmed.
System compatibility
- [ ] The actual substrate and existing coating are identified.
- [ ] Cleaner, repairs, and filler are compatible with the bonding system.
- [ ] The veneer manufacturer approves the adhesive and substrate.
- [ ] The adhesive manufacturer approves the backing and prepared surface.
- [ ] Approval is tied to named products and retained in writing or technical documentation.
- [ ] Application conditions, working time, pressure method, and cure time are recorded.
- [ ] The planned finish is approved.
- [ ] Conflicting or incomplete technical guidance will stop the project.
Layout and quantity
- [ ] Every end, stile, rail, toe kick, opening edge, filler, and panel is measured.
- [ ] Grain direction is marked for each piece.
- [ ] Seams and frame intersections are mapped.
- [ ] Trimming allowances follow the selected product and layout.
- [ ] Waste accounts for defects, matching, offcuts, and mistakes.
- [ ] Extra matching material is considered for future repair.
Risk areas
- [ ] Sink-base cabinets have been checked for current and previous moisture.
- [ ] Dishwasher ends and nearby seams have been examined.
- [ ] Oven-adjacent panels have been evaluated against product heat limitations.
- [ ] Toe kicks and floor-level edges are dry and intact.
- [ ] Previously swollen or damaged edges receive additional scrutiny.
- [ ] No product is being called waterproof without product-specific support.
Complete budget
- [ ] Full veneer or laminate sheets
- [ ] Edge banding
- [ ] Replacement doors and drawer fronts
- [ ] Adhesive
- [ ] Filler and repair materials
- [ ] Compatible stain, paint, sealer, or clear finish
- [ ] Cutting, pressing, and preparation tools
- [ ] Replacement blades and abrasives
- [ ] Hardware and hinges
- [ ] Shipping and oversize charges
- [ ] Reasonable waste
- [ ] Professional labor or technical assistance where needed
Quality control and escalation
- [ ] Surfaces are clean, dry, stable, and flat.
- [ ] The manufacturer-directed bond check is complete.
- [ ] Observation and cure periods are documented.
- [ ] Installation can stop if adhesion, alignment, or trimming fails.
- [ ] Product technical support is available.
- [ ] An experienced installer will be consulted if construction is uncertain, surfaces are complex, raw veneer is proposed, damage is structural, or compatibility cannot be confirmed.
Frequently asked questions
Is cabinet veneer real wood?
It can be. Real-wood cabinet veneer is a thin natural-wood layer bonded to a backing or stable core. It retains genuine grain and natural variation.
Retailers may also use “cabinet veneer” as a broad search term for laminate, thermofoil, printed film, and edge banding. Confirm the composition rather than relying on a product title or wood-look image.
Can veneer be applied over painted or previously finished cabinets?
Possibly, if the existing finish is stable and the veneer and adhesive manufacturers approve the complete system. The surface may require compatible cleaning, repairs, flattening, and product-specified scuff preparation.
Do not assume veneer will bond to every paint, varnish, stain, laminate, or previous refacing layer. A loose, brittle, contaminated, or poorly bonded coating remains a weak link.
Is peel-and-stick veneer better than paper-backed veneer with separate adhesive?
Not universally. Peel-and-stick veneer reduces separate adhesive handling, but it still needs an approved substrate, accurate alignment, a flat and clean surface, firm pressure, edge treatment, and compliance with application and cure requirements.
A separate adhesive offers a different working method. Compare substrate approval, working time, positioning method, pressure requirements, cure schedule, and finish compatibility for the named products.
Can scratched, chipped, bubbled, or peeling cabinet veneer be repaired?
Sometimes. Minor finish scratches, small chips, or a localized loose edge may accept a compatible touch-up or product-approved repair. Safe sanding depends on veneer thickness, remaining wood, finish, substrate, and damage depth.
Widespread peeling, incompatible adhesive, swollen cores, recurring moisture, or major delamination can require removal and replacement of the surface, panel, or cabinet. Diagnose the cause before attempting a cosmetic repair.
How much does cabinet veneer cost?
Material prices vary by species, cut, backing, grade, matching, sheet size, adhesive format, shipping, and availability. Catalog and marketplace figures are examples, not market averages.
A useful project budget includes veneer, edge banding, adhesive, finish, repairs, shipping, waste, tools, hardware, labor, and any replacement doors or drawer fronts. Compare quotes by usable square footage and equivalent specifications rather than sheet price alone.
Final recommendation
Keep cabinet veneer on the shortlist when the boxes are dry and structurally sound, the existing layout works, and a compatible material-and-adhesive system can be verified for the actual substrate and coating.
Repair or replace cabinets when damage is structural or moisture-related. Pause when the substrate, adhesive, finish, curing requirements, or product-specific safety instructions cannot be confirmed.
The best cabinet veneer is not simply the most attractive sheet. It is the product that fits the cabinet surface, installation method, exposure, maintenance expectations, visual plan, and complete project budget.