
Stained Red Oak Cabinets: Choose the Finish on the Actual Wood
Choose stained red oak cabinets by undertone, grain and finished samples. Learn what to specify in a quote and what changes when restaining existing oak.
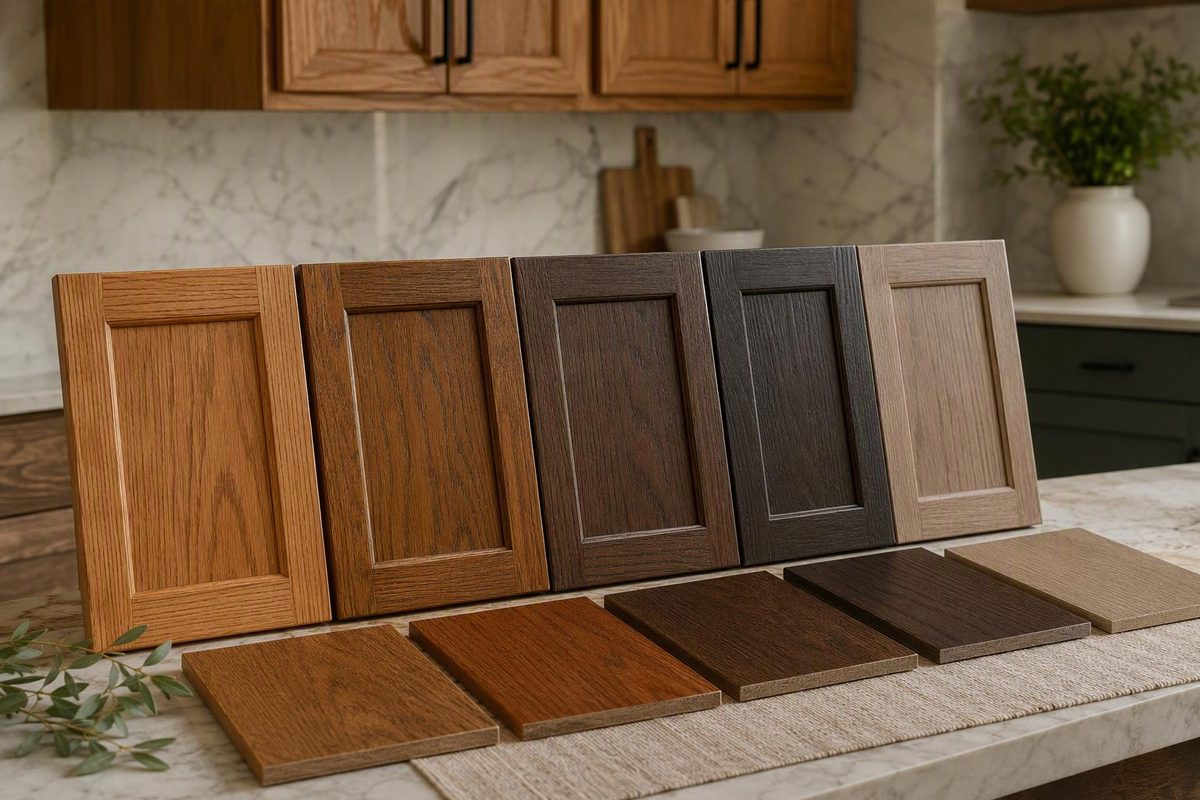
Stained red oak is worth considering if you want visible wood grain and can accept natural color variation. The important choice is not just the stain name: it is red oak plus the grain pattern, stain and protective topcoat. Approve that combination on a finished cabinet sample, not on a color chip made from another wood.
If your goal is pale, nearly pink-free cabinetry with straight grain, compare red oak and white oak samples before committing. A stain can change the color; it cannot change the species or the way the wood was cut.
What red oak brings to the finish
Red oak is not necessarily red-colored cabinetry. Its heartwood is typically light to medium brown with a reddish cast, and its texture is coarse with large, open pores. It stains and finishes well, but those underlying characteristics remain part of the result. White oak tends toward a more olive cast, although color alone is not a reliable way to identify the species. The Wood Database describes these differences.
The grain deserves as much attention as the undertone. Plain-sawn oak can show prominent arches—often called cathedral grain—alongside straighter sections. Quarter-sawn oak produces a different pattern, with straighter grain and visible ray fleck. Dura Supreme, for example, distinguishes its plain-sawn red oak from its quarter-sawn white oak rather than treating “oak” as one appearance. Its cabinet-wood guide explains the cuts.
If you dislike cathedral grain, changing the stain is not the solution. Ask which cuts are available, particularly on large doors and exposed end panels. For veneer components, our oak veneer specification guide covers the additional grain-matching questions.
Which stain direction should you sample?
Use these as comparison groups, not promises about a particular stain formula:
| Finish direction | What to judge on the sample |
|---|---|
| Light natural or pale brown | Is the underlying reddish cast acceptable beside your counters and flooring? |
| Medium brown | Does the brown look balanced, or still too red or golden for your kitchen? |
| Gray-brown or muted brown | Does it look neutral in your lighting, without an unwanted pink or purple impression? |
| Dark brown or espresso | Do you still like the grain contrast and the overall darkness across a full door? |
Red oak is not limited to honey-colored finishes. Dura Supreme documents red oak in pale browns, deep espresso-like finishes, true browns and browns with gray undertones. Those are examples of factory finish possibilities—not evidence that a similarly named retail stain will reproduce them. See the manufacturer’s red oak examples.
For a less golden look, start by comparing medium brown and muted brown samples. For a pale look, request samples on several pieces of red oak rather than choosing from one unusually neutral board. Do not accept “this stain removes the pink” as a substitute for seeing the result.
Approve a complete finished sample
General Finishes advises testing the complete finishing process because wood variation and room lighting affect stain color, and a topcoat can deepen it. Its stain instructions explicitly call for this test.
For a cabinet purchase, make that test useful:
- Request a full sample door if possible. Judge the frame and center panel together, not just a small flat swatch.
- View it upright in the kitchen. Check daylight and the lighting you will use at night, beside counter, backsplash and flooring samples.
- Compare an exposed-end sample. Ask whether doors, panels, fillers and trim will use the same species and finish schedule.
- Ask to see acceptable variation. One approved door should not imply that every board will have identical color or grain.
- Confirm the topcoat and sheen. Stain supplies color; it is not the whole protective finish. General Finishes notes that stains are not durable on their own. Its product guidance explains the distinction.
Our guide to stain finishes on cabinets explains what to record beyond the color name.
Restaining existing red oak is a different decision
A raw-wood sample will not predict a stain applied over your cabinets’ existing finish. General Finishes recommends a dry-brush technique for its Gel Stain over prepared existing finishes, with cleaning, light sanding, a complete test and longer drying times. It warns against painting on gel stain without wiping away the excess. Follow the product-specific instructions.
Going lighter is not simply a matter of applying a lighter stain. For example, in its Java Gel Stain troubleshooting guidance, General Finishes says that once the finish has hardened, lightening that result requires sanding down the current stain and starting over, or using paint instead. That is guidance for correcting its Java finish, not a universal removal method for every cabinet coating. See its lightening guidance.
Before approving a refinishing quote, require a test on an actual cabinet component and a clear explanation of what finish must be removed. If veneer is involved, establish what can safely be removed before agreeing to aggressive sanding.
For new cabinets, put red oak species, grain cut, component materials, finish code, topcoat, sheen and the approved sample reference in the order. Compare prices only after those details match; a quote that says merely “stained oak” leaves too much of the finished kitchen undecided.